One neophyte’s first steps into the wide world of 3D printing.
Then, this past Christmas, my wife forced the issue by getting me a Bambu Lab A1 as a present.
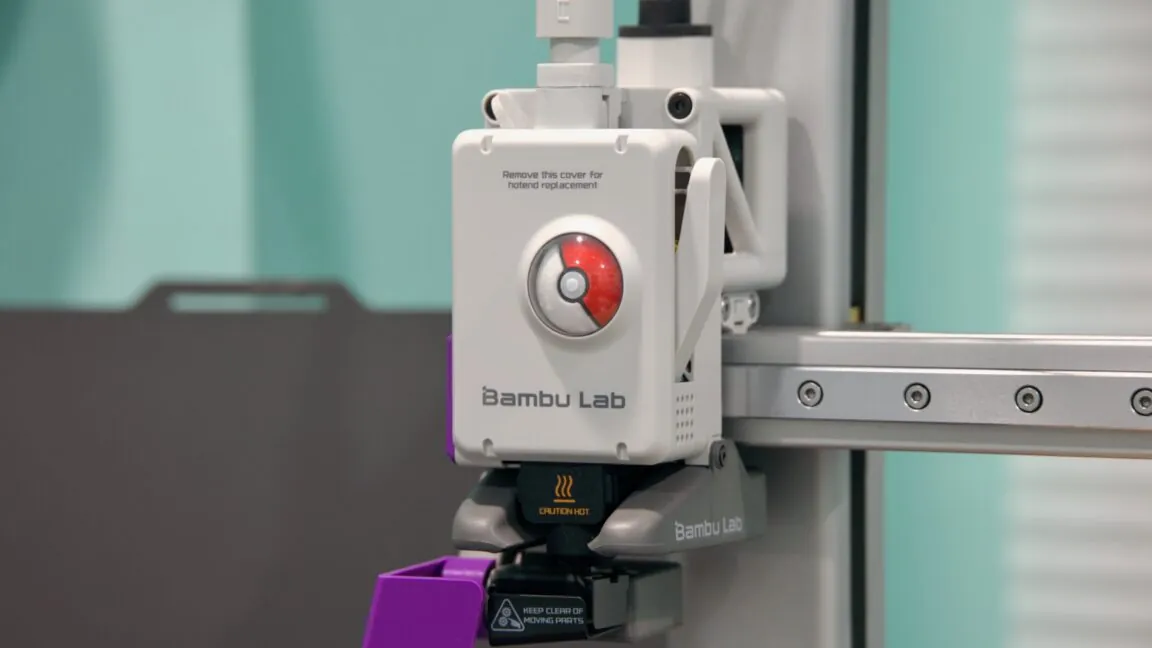
Getting to know my printer My wife settled on the Bambu A1 because it’s a larger version of the A1 Mini, Wirecutter’s main 3D printer pick at the time (she also noted it was “hella on sale”).
The Bambu A1 is a Cartesian printer, or in more evocative and colloquial terms, a “bed slinger.”
This time, I talked about what I learned about basic terminology and the different kinds of plastics most commonly used by home 3D printers.
The initial steps taken by a novice in the vast realm of 3D printing.
Andrew Cunningham – 2:30 PM, May 22, 2025.
narrative text.
Width * Links in size.
* Exclusive to subscribers.
Discover more.
I’ve spent the last few years looking for a reason to purchase a high-quality 3D printer.
After you get used to the idea of being able to create real, tangible objects with a little time and a few dollars’ worth of plastic filament, friends and fellow Ars staffers who had them would rave about them whenever they could. They would also talk about how useful they can be and how much can be printed.
I couldn’t, however, see myself using one frequently enough to purchase one. My wife then pushed the issue by giving me a Bambu Lab A1 for Christmas this year.
Almost every day since then, I’ve been playing around with it, learning more about what I’ve gotten myself into, and finding new and interesting things to print. I’ve compiled a number of ideas about my learning process here, not because I believe I’m innovating, but rather to provide a guide for anyone who has been hesitant to start 3D printing. “Hyperfixating on new hobbies” is one of my favorite coping strategies when I’m feeling stressed or anxious, and 3D printing has proven to be the ideal balance of entertaining, useful, and time-consuming.
Knowing my printer better.
Given that it was “hella on sale” and that it was a larger version of the A1 Mini, which was Wirecutter’s top 3D printer choice at the time, my wife decided on the Bambu A1. According to other reviews she read, it’s easy to use, fun to experiment with, and beginner-friendly. It also has a fairly active community for answering questions, all of which I agree with so far.
Keep in mind that this study was completed a few months prior to Bambu making negative news due to firmware updates that some users fear will result in a more closed-off ecosystem. I can see why this is a contentious issue—3D printers are still mostly used by do-it-yourselfers and tinkerers, who are particularly sensitive to the closure of open ecosystems. I don’t really feel as though I’ve lost the features I was depending on because, as a novice, I’m already primarily using the built-in functionality and first-party tools to get everything going. Additionally, Bambu’s update largely allayed any worries I had.
Since the early days of home 3D printing, I hadn’t really updated my preconceptions about it, something that Ars has been around long enough to have discussed in some detail. Building your own gaming PC is one hobby that involves tinkering with and maintaining the equipment, so I was hesitant to get involved in another one. Nothing will entice you to pursue the hobby more quickly than a few successful prints, and Bambu’s printers (and others like them) can produce reasonably high-quality prints with little fuss.
Simple words.
First, the A1 is what is known as an “extrusion” printer, which means that it works by melting a long, thin thread of plastic (filament) and then depositing it in tens, hundreds, or even thousands of thin layers onto a build plate that is placed on top of a heated bed. This is also known as “fused deposition modeling,” or FDM, in the manufacturing industry. This layer-based extrusion is what gives 3D-printed items their characteristic ridged texture and appearance. It also explains why 3D-printed plastic is weaker and less detailed than injection-molded plastic, such as a Lego brick.
“Stereolithography” (SLA), the other widely accessible home 3D printing technology, uses UV light to solidify liquid resin into a plastic structure. Cheap resin printers are available for about the same price as the best low-cost extrusion printers, and the SLA process can produce 3D prints that are much more detailed, smooth, and waterproof (it’s popular for making figurines for tabletop games). These printers’ smaller print beds, the fact that resin is a little more difficult to work with than filament, and the inability to print in multiple colors are some drawbacks.
Extrusion printers for home use come in two primary varieties. In more evocative and informal terms, the Bambu A1 is a “bed slinger,” or Cartesian printer. These allow the printer’s head to move side to side on one rail and up and down on one or two rails. To “move” the print head along the Y axis, however, the print bed itself must move forward and backward.
“CoreXY” printers are more costly home 3D printers, such as the more expensive Bambu models in the P- and X-series. These printers have a third rail or set of rails (as well as additional Z-axis rails) that enable the print head to move in all three directions.
Additionally, the A1 is an “open-bed” printer, meaning that it comes without an enclosure. Despite being more costly, closed-bed printers can help control the fumes from the melted plastic and maintain a more constant internal temperature. They can lessen the noise that your printer produces as well.
When combined, the drawbacks of an open-bed printer (worse temperature, fume, and dust control) and a bed-slinger (increasing wobble for tall prints, increasing chances for parts of your print to come loose from the plate) essentially mean that the A1 isn’t suitable for printing some types of plastic and has more potential points of failure for large or delicate prints. I’ve had a generally good experience with the A1 now that I’m aware of those limitations, but the type of printer you purchase will depend on what you want to print.
Setting up.
For someone who has spent years building PCs and fixing small electronics, the setup procedure was really easy overall. Although it’s not quite the same as the “take it out of the box, remove all the plastic film, and plug it in” method of configuring a 2D printer, the start guide’s instructions are clear and well-illustrated; if you can assemble prefabricated IKEA furniture, you can probably handle this level of complexity. Although it may still seem more daunting to non-technical people due to the delicate electronics involved, it is quite easy to figure out what goes where.
The surface that I first attempted to place the printer on was the only error I made when configuring it. I made use of a spare end table, but as I found out when calibrating the printer, the bed and print head’s jerky movement was much too much for a small table to manage. Although it is clear in hindsight that “stable enough to put a lamp on” is not the same as “stable enough to put a constantly wobbling contraption” on, this article exists because I was unaware of this.
I was able to relocate the printer to my sturdy L-desk, which was laden with cables and other accessories, after some office reorganization. This surface was strong enough to allow the printer to finish its calibration process without transferring any of its movements to our child’s room below. This is helpful when I need to print something after he’s gone to bed.
Bambu Studio (for Windows, macOS, and Linux) and Bambu Handy (for iOS/Android, without a native iPad version) are the first-party Bambu apps for sending files to the printer. Handy functions well for both sending pre-made models from MakerWorld, a repository for 3D printable files that is primarily run by the community but also includes Bambu developers, and for tracking prints after they have begun. However, I will primarily share my experience with Bambu Studio, which is a much more feature-rich app. While neither app currently requires sign-in, it is easiest to facilitate communication and syncing by using the same account to sign into both your printer and apps.
An introduction to Bambu Studio.
In the hobby world, Bambu Studio is referred to as a “slicer,” a piece of software that takes pre-existing 3D models produced by popular CAD programs (such as Tinkercad, FreeCAD, SolidWorks, Autodesk Fusion, and others) and transforms them into a set of precise movement instructions that the printer can comprehend. The main purpose of Bambu Studio is to open files, select a few settings, and send them off to the printer to become tangible objects. It also lets you do some basic modifications to existing models, such as cloning parts, resizing them, and adding supports for overhanging bits that would otherwise droop down.
It’s not the easiest application to use, but if you’ve read this far, you shouldn’t have any trouble understanding Bambu Studio. After selecting your printer model (all Bambu models and a wide range of third-party printers are officially supported), you will need to leave the filament settings alone and sign in if you wish to use Bambu’s cloud services. These maintain track of the models you save and download from MakerWorld and sync printer settings, but for privacy-conscious users and Bambu skeptics, there is a non-cloud LAN mode.
Simply connect your printer, open a .3MF or .STL file that you downloaded from MakerWorld or another source, choose your filament from the drop-down menu, click “slice plate,” and then click “print.” That’s more than enough for a novice. The default 0.4 mm nozzle size and Bambu’s included Textured PEI Build Plate are typically already taken into account, but you might need to confirm these settings the first time you open a file.
An array of numbers will be spit back at you by the app when you slice your build plate for the first time. Neophytes in 3D printing should keep an eye on these two crucial ones. The first is the “total filament” figure, which indicates how many grams of filament the printer will use to create your model. Since filament usually comes in 1 kg spools and the printer usually doesn’t keep track of usage, you might want to keep track of how much you’re using to prevent running out in the middle of the job. The second is the “total time” figure, which indicates how long the print will take overall, starting with the initial calibration steps and ending with the job completion.
People who use Bambu’s first-party spools will find it easiest to choose filament because the app already has the best settings set up. But when sticking to PLA (polylactic acid, the most popular and typically easiest-to-print of the various types of filament you can buy), I’ve had virtually no issues with the “generic” presets and the spools of generic Inland-branded filament I’ve purchased from our local Micro Center. But in part two of this series, we’ll go into greater detail about plastics.
I won’t claim to be an expert enough to go into great detail about every setting that Bambu Studio offers, but these are some of the odds and ends that I’ve found to be most helpful.
By right-clicking an object and selecting “clone,” you can access the “clone” function. Useful for fitting multiple copies of an object on the build plate at once, particularly when using a color-gradient filament and wanting to spread the gradient effect over a number of prints to enhance its visibility.
The fourth button on the left under the “prepare” tab is the “arrange all objects” function. Bambu Studio will organize everything on your build plate to maximize the use of space. Did you simply clone a number of objects or did you remove a single object from a model because you didn’t need to print that part?
Layer height, which can be found in the sidebar just below “Process” (which is directly beneath the filament selection area). The typical 0 point 2 mm layer height is adequate for a large number of functional parts. For better or worse, using thinner layer heights takes longer to print but can preserve more detail on prints with a lot of it and lessen the visible layer lines that give 3D-printed objects their distinctive appearance. On the other hand, thicker layer heights preserve less detail while marginally cutting down on printing time.
Wall loops and infill percentage are found in the Strength tab, which is located beneath the “Process” sidebar item. You shouldn’t worry about adjusting these settings too much for most regular prints because the infill percentage controls how much of the interior of your print is made of plastic and how much is empty space (15 percent is usually a good happy medium between maintaining rigidity and overusing plastic). The number of wall loops dictates how many layers the printer uses for the print’s exterior; more walls use more plastic, but they also give functional prints that require it a little more strength and rigidity (think hooks, hangers, shelves and brackets, and other items that will be asked to bear some weight).
The first prints I made.
When I had the chance to use a 3D printer, my first thoughts were of things that would be extremely useful, like prints for organizing the random items that are always lying around my desk or office.
Only one bedroom had a ceiling fan installed when we moved into our current home. In every other bedroom, I installed remote-controlled ceiling fans myself. Additionally, every fan—aside from one—came with a caddy that was mounted on the wall to store the remote control. A wall-mounted holder for that remote control was the first item I made the decision to print.
However, the simplicity with which I discovered a Hampton Bay Ceiling Fan Remote Wall Mount is fairly indicative of my experience thus far, even though MakerWorld is only one source for pre-made 3D-printable files. If you’re willing to consider it and it’s not a bad idea, you can typically find someone who has produced something similar to what you’re looking for at this stage of home 3D printing’s development.
After downloading that 3MF file, opening it in Bambu Studio, slicing the file, and pressing print, I loaded my black roll of PLA plastic—usually the least expensive, easiest to purchase, and easiest to work with kind of 3D printer filament, though it’s not always the best for prints that need more structural integrity. Somewhere, it seemed like there ought to have been more steps. However, that was all that was necessary to activate the printer.
The nozzle began laying plastic down on my build plate after a few minutes of warmup—by default, the A1 has a comprehensive pre-print setup process that examines the bed’s levelness and tests the filament’s flow rate for a few minutes before it starts printing anything—and an hour or so later, I had my first 3D-printed item.
The sensation of printing a fully 3D object that emerges from the plate and then simply exists in space alongside me and all the store-bought items in my office wears off a little after a successful print, but I still can’t quite get rid of it.
The remote holder was, as I would discover, a fairly straightforward print produced in almost perfect conditions. However, it was an easy success to begin with, and that success can inspire confidence and interest, encouraging further printing and experimentation. Additionally, you will unavoidably learn more the more you experiment.
This time, I discussed what I had learned about definitions and the types of plastics that home 3D printers typically use. The following time, I’ll discuss some of the problems I encountered following my early successes, what I discovered about using Bambu Studio, how to adjust settings to achieve optimal results, and a plethora of 3D-printable A1 upgrades and modifications.
Technology Reporter Andrew Cunningham, Senior.
Senior Technology Reporter Andrew Cunningham.
At Ars Technica, Andrew works as a Senior Technology Reporter, specializing in consumer technology, including computer hardware and in-depth analyses of operating systems like Windows and macOS. Living in Philadelphia, Andrew co-hosts the weekly book podcast Overdue.