And this opened the door to my first major printing project: printing additional parts for the printer itself.
For example, did you know that ABS plastic doesn’t print well on an open-bed printer?
This ended up being a tricky first experiment with PETG plastic for three different reasons.
PETG filament is also especially susceptible to absorbing moisture from the air, which can make extrusion messier.
Acrylonitrile butadiene styrene, or ABS You probably have a lot of ABS plastic in your life.
Among other things, 3D printing new parts for the A1 taught me a lot about plastic.
Andrew Cunningham, 2:00 PM, May 28, 2025.
narrative text.
Links * Size Width.
Only subscribers.
Discover more.
Over the past three months or so, I’ve been learning how to use—and falling in love with—a Bambu Labs A1 3D printer, a large, noisy device that sits on my desk and creates tangible objects from images on my computer screen.
I discussed my learnings about the various kinds of 3D printers, some helpful settings in the Bambu Studio app (which should be generally helpful to know about regardless of the printer you use), and some early, magical-feeling successes in downloading files that I converted into useful physical items using a few feet of plastic filament and a few hours of time in the first installment of my series about delving into the wild world of 3D printers.
For this second part, I’m focusing on what I learned when I embarked on my first major project—printing upgrade parts for the A1 with the A1. These were some of my first significant 3D printing errors, which led me to research the various types of 3D printer filament, their applications, and which types the A1 is (and is not) capable of handling as a bed-slinging, unenclosed printer.
Much like the material in part one, I share this with you because there is a lot of information available and it can be a daunting pastime to start. This is not to say that it is revolutionary. I hope that by sharing what I discovered and what I found helpful early on in my journey, I can assist others who have been considering making the leap.
Recursion adventures: printing 3D printer components.
A holder for the ceiling fan remote in my office was my very first project. Similar to the first, my second was a wall-mounted holder for my gaming PC’s Xbox gamepad and wired headset, which had to float around loose on my desk when I wasn’t using them.
Both of these prints demonstrated that the printer was operating as intended; the textured PEI plate, the printer’s calibration, the auto-bed-leveling features, and all of the built-in temperature settings made simple prints as effortless as Bambu had promised. I became excited to look for additional prints, including items on the Makerworld website that I hadn’t considered trying yet.
The first issue I encountered was that the A1 spits out a few grams of filament and throws it aside as part of its pre-print warmup routine. This is known as “purging,” and it is completely normal. It removes filament that has become brittle due to prolonged heating. It also removes any remaining remnants of the previous color that may be in the nozzle when you’re changing colors. However, having the printer constantly throw tiny knots of plastic onto my desk didn’t seem very classy.
A 3D-printed purging bucket for the A1—also known as a “poop bucket” or “poop chute,” of course—was the answer to this problem. Because the A1 is a reasonably well-liked low-cost model, there are actually a ton of purging buckets made especially for it, and there is nothing stopping people from creating parts that fit it perfectly.
This bucket and a second small bracket that would “catch” the purged filament and ensure it fell into the bucket were both printed by me. And this made it possible for me to start my first significant printing project, which was to print extra printer parts.
Since I’m reportedly not the only person who has experienced this reaction to the A1, I went to YouTube and watched a few videos about the subject. Following a great deal of reading and viewing, these are the sections I ultimately printed.
Bambu Lab AMS Lite Top Mount and Z-Axis Stiffener: The optional add-on that allows multi-color printing on the A1 is the Lite variant of Bambu’s Automated Materials System (AMS). It is also an open-air, less expensive version of the AMS that is compatible with Bambu’s more costly printers, just like the A1 itself.
You can place the AMS Lite on the stand that comes with it next to the A1, but that would require more horizontal room than I had. Bambu’s official solution for mounting the AMS Lite on top of the A1 and saving space is this top mount.
Actually, the top mount consists of two key parts: the top mount itself and a pair of legs called a “Z-Axis Stiffener,” which extend behind the A1 to increase the stability of the entire setup on a desk or table. You probably have enough room for these legs if you’ve left 195 mm (7.7 inches) of “safety margin” behind the printer, as Bambu already advises this to allow the bed room to sling.
To correct for the balance discrepancy, it’s probably a good idea to repeat the printer’s calibration cycle after installing all of these components, the top mount, and a fully loaded AMS.
PETG, which is a little stronger and more impact-resistant than PLA plastic, might be a good choice for printing the top mount itself.
By Jimbobble, the A1 Purge Waste Bin and Deflector. Each of the roughly one million distinct A1 purge bucket designs has a unique appeal. This one, however, is big and straightforward, and it comes with a version that works with the Z-Axis Stiffener legs of the printer.
Arzhang Lotfi’s rectangular A1 fan cover. Numerous options are available for this, including entertaining ones, but there are dozens of straightforward grille designs that fit into place and shield the A1’s print head’s fan.
This one is a little trickier because it involves some potentially warranty-voiding component disassembly: the Bambu A1 Adjustable Camera Holder by mlodybuk. No matter where you put it, the A1’s camera is also pretty bad. It produces sub-1 frames per second video that is hardly good enough to determine whether a print has been damaged or not.
It’s low down and at an odd angle, so you’re not getting the best view of your print. If you want to use it, though, I’d strongly advise moving it from the default location.
This print comes with a redesigned camera cover, a filler piece to cover the space left by the camera to prevent dust and other debris from entering the printer, and a tiny camera receptacle that attaches to the new cover and can be raised and lowered.
The camera is functional as is if you don’t feel comfortable altering your device in this way, but it gave me a far better perspective on my prints.
An unobtrusive method of protecting (and “turning off”) the A1’s built-in LCD screen when not in use is the Rox3D A1 Screen Protector, which was recently released. This print’s hinge mechanism is sufficiently rigid to allow for partial screen cover lifting without the cover sagging back down.
Moria3DPStudio’s A1 X-Axis Cover is another only-if-you-want-it print. When not in use, the foldable cover slides over the exposed rail of the A1. It won’t break anything, but the printer won’t be pleased with you if you don’t take it off before printing anything. Not that I have any firsthand knowledge.
Here’s the big one: Supergrapher’s Ultimate Filament Spool Enclosure for the AMS Lite is a real learning opportunity for a variety of topics. For the P- and X-series printers, the standard Bambu AMS system is enclosed, which controls humidity and prevents dried-out spools from reabsorbing moisture in addition to preventing dust from landing on your filament spools. Whether the AMS Lite is mounted on top of or to the side of the A1, it can be enclosed with this user-made enclosure, which is adaptable and well-liked despite the lack of a first-party enclosure for the device. The advantages outweigh the slight annoyance of popping the tiny plastic clips that hold the lids on and off compared to a lid that you can simply lift up and put back down.
One of the few entirely cosmetic components I’ve printed is the 3D disc for A1-“Pokéball,” created by BS 3D Print. Although it is not a working component, the small rotating portion on the front of the A1’s print head indicates when the filament is being extruded. If you decide to pop it off, there are countless cosmetic alternatives available.
Sturdy Modular Filament Spool Rack by Antiphrasis: This isn’t exactly an A1 upgrade, but it’s a great option for any new 3D printer that finds itself with a rainbow of more than a dozen filaments you want to try. You can create something that precisely suits your needs and your available space by printing extra shelves to spread them out either horizontally, vertically, or both. Each shelf here holds three spools of filament. I could fit 18 spools on a two-by-three shelf, and I could print more if I needed to.
Others have suggested a few items for the A1 that I haven’t printed yet, primarily cable guides, base vibration dampeners, and reinforcements for potential stress points on the print head and the loose, dangling wire of the A1.
Finding prints that might help you solve your problems and then testing them out to see if they work is part of the fun. (The parts have also given my A1 its purple accents, since a bright purple roll of filament was one of the first ones my 5-year-old wanted to get. ).
initial errors.
Printing each of these sections provided me with a thorough crash course in typical pitfalls and rookie errors.
Did you know, for instance, that ABS plastic does not print well on an open-bed printer? Well, it does not, but I was unaware of this when I purchased a spool of ABS to print some parts that I wanted to be more durable and resilient to deterioration. I reasoned that I could cope with the fumes by opening the window and leaving the room.
Z-Axis Stiffener supports for the A1 went wonky when I tried printing them in ABS. ABS has a tendency to warp and curl upward at lower bed temperatures and, more importantly, at room temperature, so extrusion-based printers depend on accuracy to function. Any layer that is messed up during printing will affect the rest of the object. Because of this, my initial attempt at support was completely useless.
I then experimented with printing a second set of PLA supports, which were supposed to be sturdy while utilizing less infill (the amount of plastic that is actually used inside the print to give it rigidity; generally, 15 percent is a good balance between rigidity and wasting plastic that you’ll never see, though there may be times when you want more or less). I’m still not sure what I did, but the prints I obtained felt crunchy and squishy to the touch, which is a definite indication that there wasn’t enough infill, either in quantity or kind. I didn’t make supports I could use until my third attempt, which was the original Bambu-made supports made of PLA rather than ABS.
After doing a lot of reading and research, I discovered that if you want to create more durable (and outdoor-friendly) prints on an open bed, you should use PETG plastic for the majority of items. Great! In order to create something sturdy and transparent for determining the amount of filament remaining on a particular spool, I chose to print the majority of the A1 ABS enclosure using clear PETG filament.
For three reasons, this proved to be a challenging first experiment with PETG plastic. First, a larger nozzle (Bambu offers 0.2 mm, 0.6 mm, and 0.8 mm nozzles for the A1, in addition to the default 0.4 mm) is the best option for printing “clear” PETG that actually looks clear because you can accomplish the same task in fewer layers, and the more layers you have, the less “clear” that clear plastic will be. Alright,
Both the filament and the heatbed of the Inland-brand clear PETG+ I purchased from our neighborhood Micro Center didn’t like the A1’s generic PETG’s default temperature settings; the plastic flowed unevenly from the nozzle and was prone to separating from the bed. Entering Bambu Studio, adjusting the temperature by 5 degrees in either direction, and attempting a quick test print (I like this one) helped me fine-tune my settings when using a new filament. If this is happening to you, or if you want to try lowering your temperatures to save a little energy, do so.
Last but not least, PETG is particularly likely to absorb ambient moisture. When that moisture comes into contact with a 260° nozzle, it evaporates rapidly, which can affect the flow rate’s evenness and the print’s cleanliness (usually showing up as “stringing,” which are tiny, nearly cotton-like strands that hang off your finished prints).
You can purchase special drying boxes for filament or place spools in an oven set to a low temperature for a few hours if this is a major issue for you or if it has an impact on the quality of your prints. Creating a humidity-controlled environment is one of the reasons to have an enclosure, as it prevents your spools from initially absorbing excessive amounts of moisture.
Your experience may differ, but I was satisfied enough with my PETG prints thanks to the temperature and nozzle-size adjustments that I was able to later remove the tiny fuzzy stringers from my prints.
These are but a handful of the types of things you can discover if you dive right in and try out various prints and plastics quickly. I hope this guidance helps you steer clear of my particular errors. The most important lesson, however, is that experience is the best teacher.
the vast plastics industry.
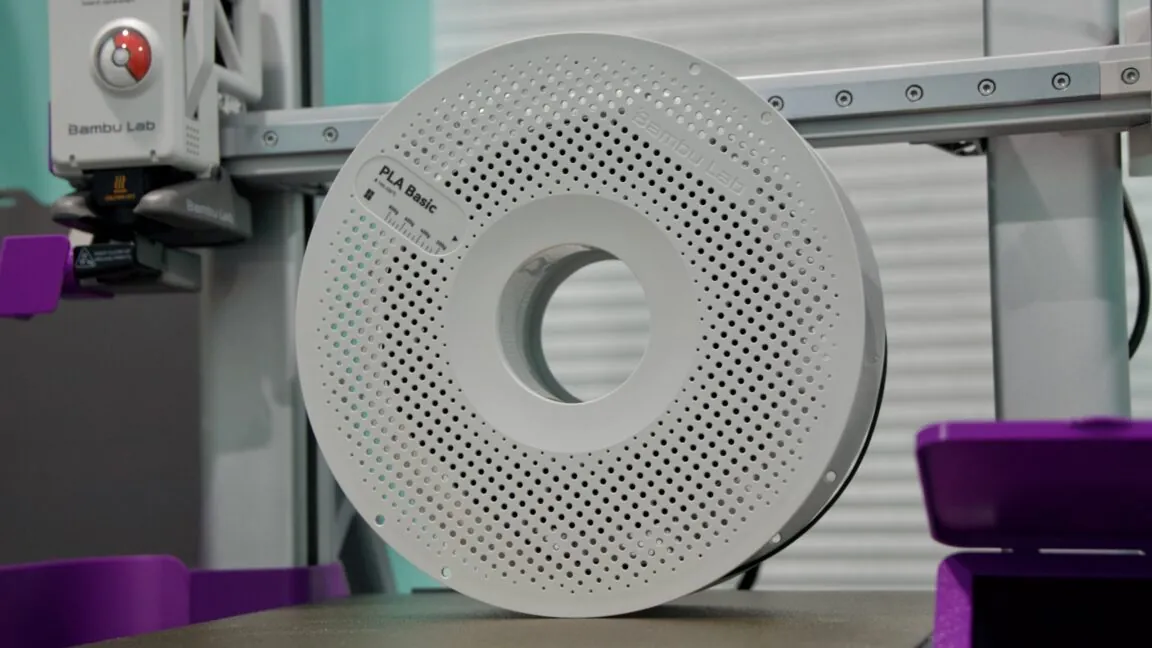
A black and a white spool of Bambu’s PLA Basic filament were the two spools my wife had given me. What does all of that signify?
It’s usually sold in 1 kilogram spools, regardless of what you’re purchasing (the weight of the plastic, not the plastic and the spool together). You will receive an estimate of the amount of filament (in grams) required for each item you print.
Numerous varieties of plastics are available both on Bambu’s website and in other retailers. However, these are the major ones that I learned about almost instantly.
PLA stands for polylactic acid.
Because PLA is cheap, comes in a wide variety of colors and textures, and has a low melting point, it is the most widely used plastic and is simple for most 3D printers to work with. It is slightly more ecologically friendly than some other types of plastic because it is composed of renewable materials rather than petroleum. If you want to create toys, props, or other items that don’t have a 3D printed appearance, it’s simple to “finish” PLA-printed parts. You can use a chemical to smooth the finish or sand the parts.
Its lack of resilience makes it an unwise choice for anything that must withstand outdoor conditions or is load-bearing; it can melt or distort after sitting in a hot car or in direct sunlight for extended periods of time. Although it is biodegradable, it takes a while to do so outside of specialized composting facilities, so its environmental benefits are also a little overstated. If you throw it in the trash and it goes to a landfill, it will still take its time returning to nature.
PLA is available in a wide variety of forms. A matte or silky texture is a result of additives in some. To give 3D printed objects the appearance, texture, or scent of those materials, some contain tiny pieces of metal, wood, coffee, or even spent beer grains embedded in them.
Some PLA simply contains an unidentified additive of some sort. The term “PLA+” is used frequently, but as far as I can tell, there isn’t a consensus within the industry regarding what the plus should mean. Other terms, such as “PLA Pro” and “PLA Max,” are similarly ambiguous and non-standardized, and manufacturers occasionally assert that it is stronger than ordinary PLA.
Glycol polyethylene terephthalate, or PETG.
PET is a ubiquitous household plastic that can be found in everything from soda bottles to clothing fibers. The same substance is PETG, but ethylene glycol (the “G”) is added to lower the melting point and lessen the material’s propensity to warp and crystallize. It also increases transparency, though it’s challenging to print anything that’s really “transparent” using an extrusion printer.
Although PETG’s melting point is higher than PLA’s, it is still lower than that of other plastics. Because of this, PETG is a suitable compromise for certain printing techniques. For outdoor use and functional load-bearing parts, it is superior to PLA because it is more durable and can bend slightly without warping, while still being sufficiently pliable to print on a variety of home 3D printers.
Even so, PETG can still be more difficult to work with than PLA. My PETG prints more often had problems with the edges coming loose from the printer bed before the print was finished.
Additionally, PETG filament is particularly prone to absorbing airborne moisture, which can complicate extrusion. My PETG prints have usually had lots of little wispy strings of plastic hanging off them by the end—not enough to affect the strength or utility of the thing I’ve printed but enough that I needed to pull the strings off to clean up the print once it was done. If I ever need the prints to be cleaner in the first place, properly drying the filament might help.
Additionally, the strongest type of filament that an open-bed printer such as the A1 can consistently handle is PETG. Although Reddit stories, my own experience, and Bambu’s filament guide all suggest a higher degree of difficulty, you can still succeed with other plastics.
ABS stands for alcohol-butadiene styrene.
ABS plastic is likely to be a common part of your life. Most things made of ABS include game consoles and controllers, plastic keys on most keyboards, Lego bricks, appliances, and plastic board game pieces.
While commercially manufactured injection-molded ABS is stronger and more durable than thin layers of ABS adhered together, ABS is still more heat-resistant and long-lasting than 3D-printed PLA or PETG.
Bambu’s frequently asked questions for the A1 also list the two main ABS-specific issues. First, it prints poorly on an open-bed printer, particularly when printing larger images. As with a house, any issues with your foundation will affect the rest of your print because the corners are more likely to pull up off the print bed.
The second is fumes. Since all 3D-printed plastics release fumes when melted, it’s a good idea to print anything in a room with a window open, preferably not one where people or objects are sleeping. However, when printing ABS and ASA plastics indoors with inadequate ventilation, they can release fumes that irritate the eyes and respiratory system, cause headaches, and induce nausea.
There isn’t much agreement on how much printing is “dangerous,” and the majority of the research that has been done falls into the inconclusive “more study is needed” category. The bare minimum of best practices is to use a closed-bed printer in an empty area of your house, such as a garage, shed, or workshop (if you have one), or to at least be able to open a window if you’re printing with ABS.
ASA is an acronym for acrylonitrile styrene acrylate.
According to Lee Hutchinson, a colleague at Ars, this material is “ABS but with more UV resistance,” making it even more appropriate for outdoor use than the other plastics on this list.
Aside from the fact that the fumes are more dangerous to breathe in, an open-bed printer will also be difficult to use well. You’ll want a closed-bed printer and decent ventilation for good results.
TPU stands for thermoplastic polyurethane.
In comparison to the other plastic types on this list, TPU is most renowned for its flexibility. It has more impact resistance, is less brittle in cold weather, and prints fairly well on an open-bed printer.
In contrast to PLA, which can take an hour or two to print at full speed for even relatively simple fidget toys, TPU has the drawback of requiring slow printing to produce consistently good results. Prints that are longer will consume more power and have a higher chance of peeling off the print bed. Additionally, a roll of TPU filament will typically cost a few dollars more than a roll of PLA, PETG, or ABS.
The filament is first- or third-party?
The RFID chips in the first-party Bambu spools allow Bambu printers to automatically identify the type and color of filament and track how much is left in the spool. Additionally, Bambu’s Studio software and printer come with temperature and speed presets for all of its first-party filaments. Despite the fact that the printer has presets for a few different brands of filament, I typically used the “generic” presets, which might require some tweaking to guarantee optimal adhesion to the print bed and extrusion from the head.
For the most part, I used Inland-branded filament that I purchased from my neighborhood Micro Center because it is less expensive than Bambu’s first-party products and because it is quicker and simpler for me to access. If you don’t have a physical hobby store that carries filaments, the A1 and other printers occasionally include sample filament swatches so you can see the color and texture of the items you’re purchasing online.
What comes next?
You can use 3D printing for a variety of projects, such as organizing your desk or kitchen, creating fidget-toy favors for your child’s birthday party, printing replacement parts for small plastic items that have broken, or simply creating decorations and other items you’ll like to look at.
After you have all the fundamental knowledge in this guide, it is entirely up to you what to do next. What do you need? How can 3D printing help you with other household chores or hobbies that you might be trying to get into? In the final installment of this series, Ars employees who own 3D printers will share some of their favorite prints. Hearing people discuss their experiences with these devices really opened my eyes to their potential and usefulness, and more first-hand accounts might help those of you who are unsure to give them a try.
Andrew Cunningham, Senior Reporter on Technology.
Technology Reporter Andrew Cunningham, Senior.
As a Senior Technology Reporter at Ars Technica, Andrew specializes in consumer technology, covering topics such as computer hardware and in-depth analyses of operating systems like Windows and macOS. Andrew co-hosts the weekly book podcast Overdue and resides in Philadelphia.